
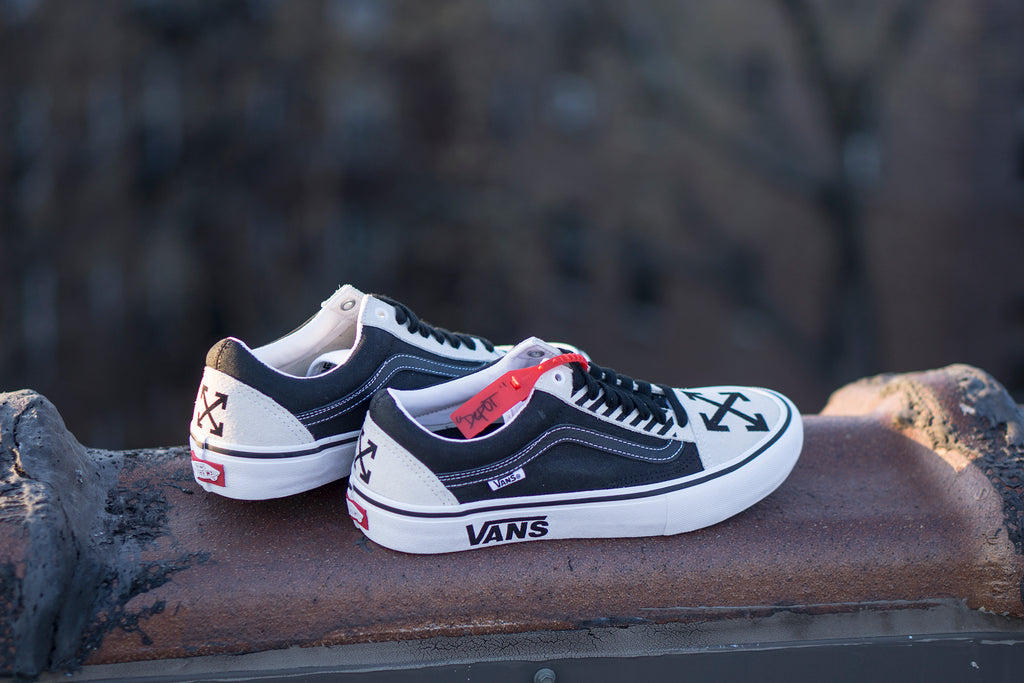

How to make Off White Vans Full Tutorial!
In our first entry we talked about some minor ideas when it comes to getting started with customizing sneakers.
In this video tutorial we go into a little bit about stencils and some do and don'ts about how to create your own vans with an off-white theme.
I am going to verbally associate some what was said to elaborate on some of it to say the least in this long lost art of writing.
We recently went into a meeting with #TeamGaryV and explained to them what it is that we do and one of the gentlemen that was in a meeting with us asked Thomas and I "how do you guys do this?" I responded with "its easy" and Thomas and I both laughed. Why respond like that to people, well think about it, if you've been a mechanic for years and you know what you're doing you could take apart a vehicle in no problem and fix whatever the issue is.
Same applies in any field you go into. Once you do this over and over again you feel a certain way about it. But enough about this and onto the nitty gritty aspect of writing this tutorial.
In the theme of "its easy" I meant in the terms of stenciling your work area. Here are a couple of things you're going to need!
First you have to get your stencils. Best place to do that is right here! If you don't see what you're looking for just send us the artwork and our stencil guy will get on it right away!
Secondly you're going to need transfer paper (if you purchase stencils from us, you get transfer paper as well).
Other tools to make life easier are going to be a squeegee card, credit card, exacto blade, pick, or toothpick. (I will explain why you need these things very soon, if you don't feel like reading watch the video lol)
Now that you have all of these products handy we can get started on your working area. Once you have prepped your area, leather, canvas, rubber or plastic you want to remove the negative area from the positive of you stencil paper. In this example the negative area is the area that you will be painting and the positive area is the area in which you will not paint. The best way to remove that is with an exacto blade, pick, or toothpick by picking at the negative area and peeling it off.
Cut the size of your work area before hand our of the stencil sheet so you could either save some for later or to avoid using the entire sheet as well as making a big mess with a giant sheet of stencils.
Once that area is removed you could place the transfer papers' sticky side onto the stencils that you will be removing and apply pressure onto the stencils from the transfer paper to get the stencils to come off of the stencil sheet and onto the transfer paper to place on your work area.
Once the stencils are placed on your work area you want to apply pressure onto the stencils from the transfer paper again to have the stencils sticky side adhere to the work area. Please make sure that your stencils are aligned properly to avoid any visual imperfections as far as placement goes. Here you can use the credit card or a squeegee card by applying downward pressure on the transfer paper.
Now that stencils are pushed down from the transfer paper you want to peel the transfer paper off leaving the stencils on your work area at an angle where you are pushing them onto your work area as well as peeling the transfer paper off while also making sure that the stencils are on as flat as possible without any air bubbles or folds in the stencils that are being placed on your work area.
Now that everything is nice and set you're ready to start painting.
Always remember light coats, no globs of paint and to dry vigorously many times so that paint adheres to shoe as well as not getting any paint underneath the stencils leaving you a crazy touch up job. It doesn't matter if you use a paintbrush or an airbrush so long as you prep the area properly and don't stray away from where you need to paint.
Everything that is written is literally covered in this tutorial video and other stencil videos we will be putting up so if you have any questions, please feel free to contact us and we'll help you as best as we can because that's what we're here for.
We are the hub for information when it comes to dealing with custom artwork.
Thanks again for hanging out with us and reading my rant on customizing,
MUAH!
Kenny,
Depot Team